kids clay charm christmas bracelet
| Step 1 |
First create your charms from clay. For the tree charm, pinch off a small amount of Kelly green and lime green clay and roll each into a snake shape. Lay the snake shapes next to each other and twist together like a pretzel. Continue to roll until you have a marbled smooth snake shape again. |
| Step 2 |
Roll one end to create a loop. |
| Step 3 |
Now, zigzag the clay into a small, tight tree shape. |
| Step 4 |
Roll tiny balls with red, orange, blue and yellow and place on your tree to simulate lights. Set aside to dry. |
| Step 5 |
For the gingerbread house, shape some brown clay into a cube shape. Pinch the top and use your fingers to smooth out a roof. |
| Step 6 |
Flatten a small piece of white clay and lay over the roof for snow. Be sure to smooth some white clay around the front of the house. |
| Step 7 |
Use small amounts of clay to create a door and a door knob. Attach to the front of your house. |
| Step 8 |
Shape tiny balls of clay and then pinch the top so they look like little morsel candies. Place on the roof, within the clay snow. |
| Step 9 |
Use a toothpick to carefully pierce a hole in the middle of the roof's peak to add a jump ring after it dries. Set aside to let dry. |
| Step 10 |
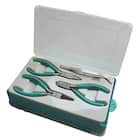
ADULT: Use pliers to attach jump rings through the loop at the top of the zigzag Christmas tree and through the hole pierced in the rooftop of your gingerbread house. |
| Step 11 |
Measure and cut 9" [3.5 cm] of stretchy cord for each bracelet. |
| Step 12 |
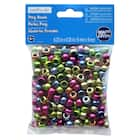
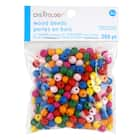
Thread beads and charms onto the stretchy cord. |
| Step 13 |
Tie the ends in a surgeon's knot, which is just an extra twist before pulling the strands tight. |
| Step 14 |
Tuck the ends inside the beads nearest to the knots and add a dab of glue to the knot. Let dry. |
- Toothpick
| Step 1 |
First create your charms from clay. For the tree charm, pinch off a small amount of Kelly green and lime green clay and roll each into a snake shape. Lay the snake shapes next to each other and twist together like a pretzel. Continue to roll until you have a marbled smooth snake shape again. |
| Step 2 |
Roll one end to create a loop. |
| Step 3 |
Now, zigzag the clay into a small, tight tree shape. |
| Step 4 |
Roll tiny balls with red, orange, blue and yellow and place on your tree to simulate lights. Set aside to dry. |
| Step 5 |
For the gingerbread house, shape some brown clay into a cube shape. Pinch the top and use your fingers to smooth out a roof. |
| Step 6 |
Flatten a small piece of white clay and lay over the roof for snow. Be sure to smooth some white clay around the front of the house. |
| Step 7 |
Use small amounts of clay to create a door and a door knob. Attach to the front of your house. |
| Step 8 |
Shape tiny balls of clay and then pinch the top so they look like little morsel candies. Place on the roof, within the clay snow. |
| Step 9 |
Use a toothpick to carefully pierce a hole in the middle of the roof's peak to add a jump ring after it dries. Set aside to let dry. |
| Step 10 |
ADULT: Use pliers to attach jump rings through the loop at the top of the zigzag Christmas tree and through the hole pierced in the rooftop of your gingerbread house. |
| Step 11 |
Measure and cut 9" [3.5 cm] of stretchy cord for each bracelet. |
| Step 12 |
Thread beads and charms onto the stretchy cord. |
| Step 13 |
Tie the ends in a surgeon's knot, which is just an extra twist before pulling the strands tight. |
| Step 14 |
Tuck the ends inside the beads nearest to the knots and add a dab of glue to the knot. Let dry. |


